Feasibility Check
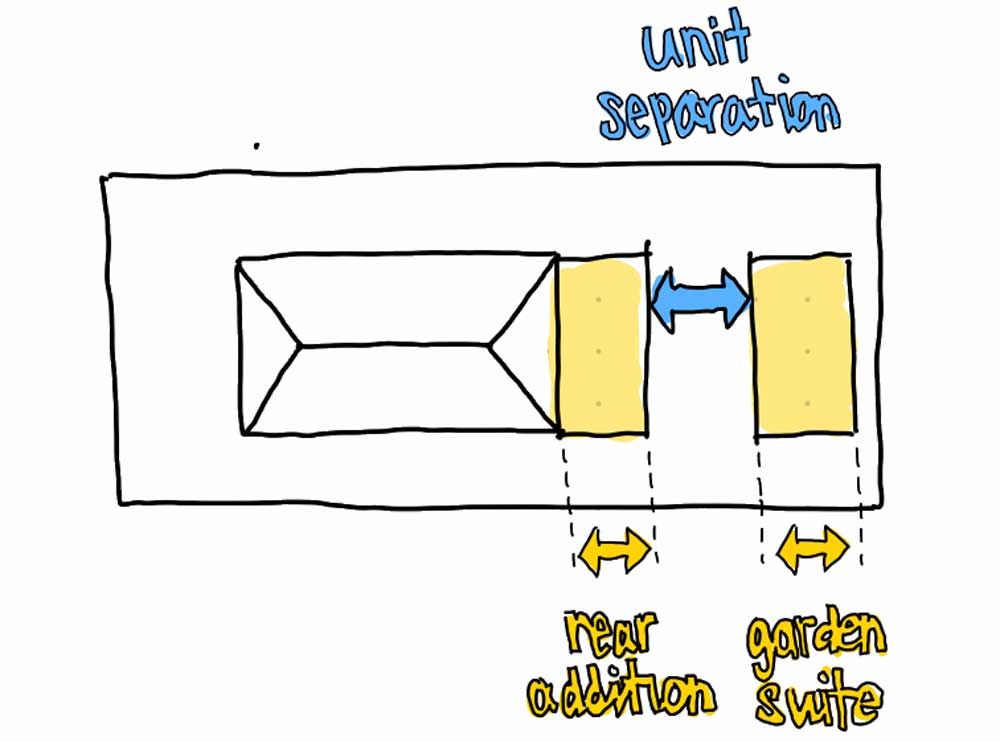
Rear Addition

This is an example of a self-contained unit added to the rear of your house. To legally register a unit, there are some specific requirements you will need to meet. The city refers residents to this Ontario website for a detailed guide for checking these requirements. Before you review the information provided by the Ontario website guide, check out our checklist below as a starting point to see if a home is a candidate for this kind of new suite. Remember to verify all code requirements with your local code, or hire a professional to do this for you!
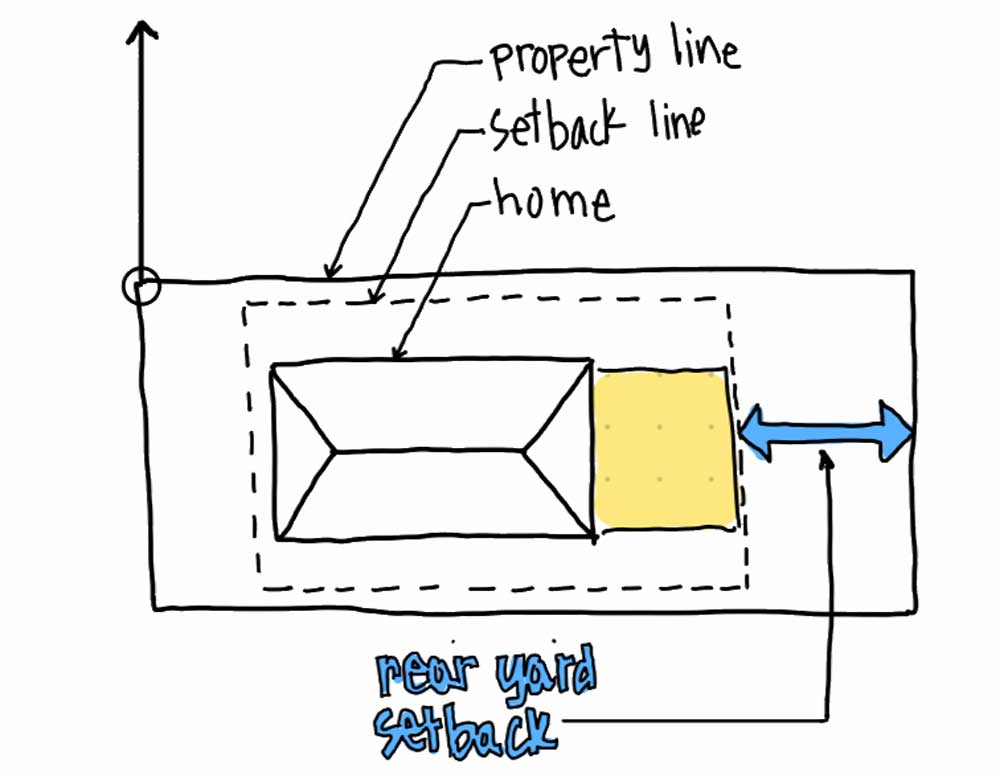
Spatial Requirements
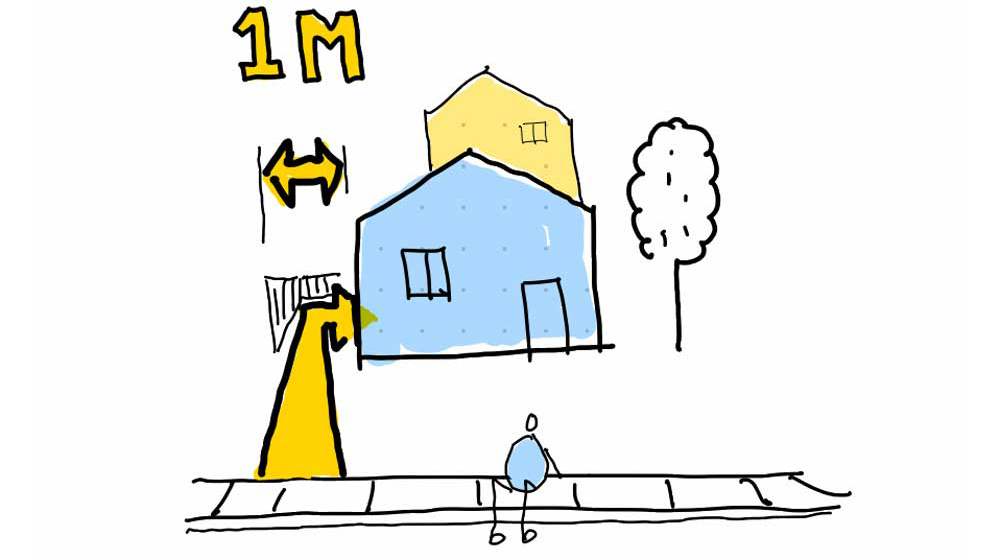
Ensure proper access
Check for access to the backyard
You need a minimum of 1m of clear passageway between your house and the edge of your lot for servicing and emergency access to the rear of the unit.
If your lot backs onto a laneway this can be used as an alternative to the 1m clear pathway from the front yard.
Check to make sure you have a room for an addition
Look up your property on the city’s zoning map page
Side and rear yard setbacks are specific to different neighbourhood zones. You can look up your property’s specific zoning regulations using this map. Here’s a video that explains how to use the city’s map website. If you have trouble navigating, ask a professional for help!
Side and rear yard setbacks are specific to different neighbourhood zones. You can look up your property’s specific zoning regulations using this map. Here’s a video that explains how to use the city’s map website. If you have trouble navigating, ask a professional for help!

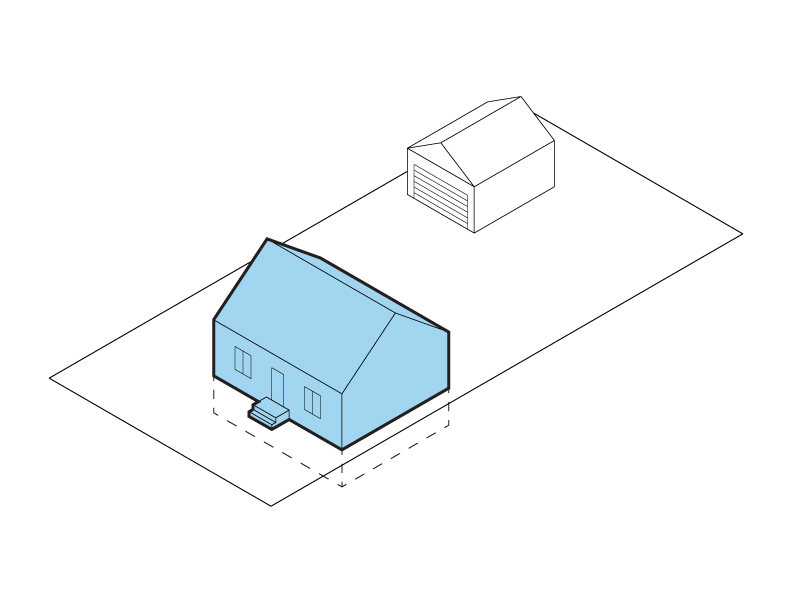
Check the rear yard setback
Once you locate your property on the zoning map, you can find a link to the zoning rules for your prperty. This will tell you the allowable setbacks and other regulations. You can also use a measure tool to check the size of the building or other dimensions. Here’s a video that explains how.
Once you locate your property on the zoning map, you can find a link to the zoning rules for your prperty. This will tell you the allowable setbacks and other regulations. You can also use a measure tool to check the size of the building or other dimensions. Here’s a video that explains how.
Check if you have space for a rear addition
Make sure you have enough space in your backyard to add a unit to the back of your home.
Make sure you have enough space in your backyard to add a unit to the back of your home.
- measure the distance from the back of your home to your rear property line
- check the zoning code for the required rear yard setback.
- subtract the allowable setback from the backyard dimension
- if the result is less than 3m, consider another option for adding units.
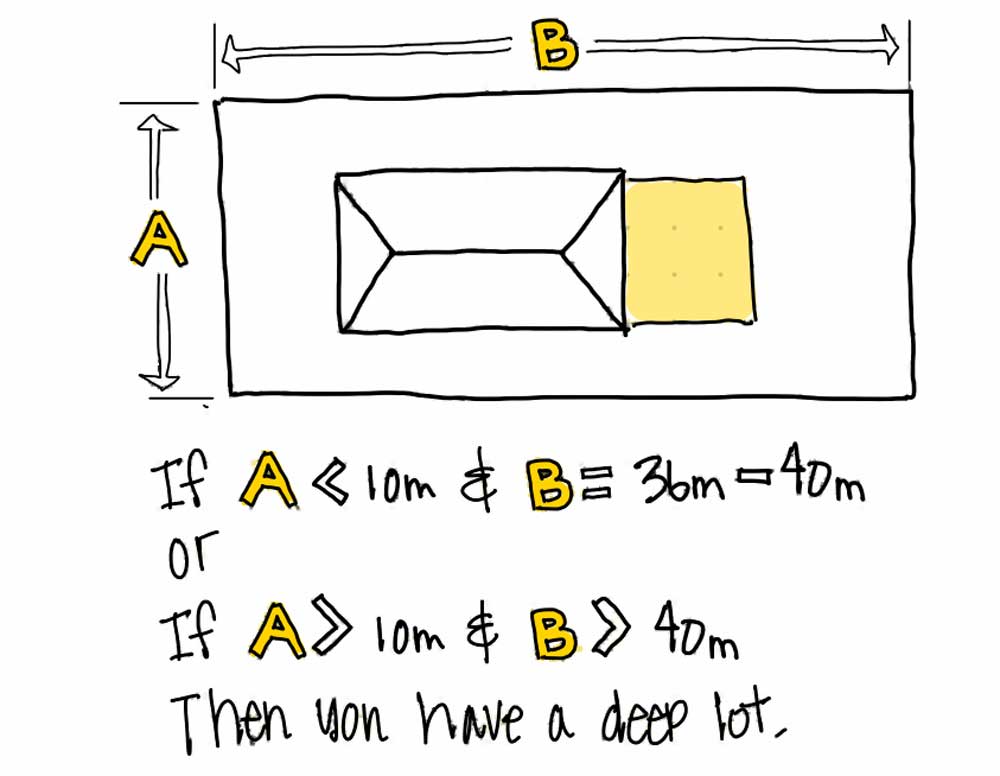
Check if you have a ‘deep’ lot
If you have a deep lot, you are allowed to have a 19m deep building, if not, you are allowed to have a 17m deep building. A deep lot is defined as being: at least 36m deep where the lot is less than 10m wide, or at least 40m deep where the lot is more than 10m wide
If you have a deep lot, you are allowed to have a 19m deep building, if not, you are allowed to have a 17m deep building. A deep lot is defined as being: at least 36m deep where the lot is less than 10m wide, or at least 40m deep where the lot is more than 10m wide
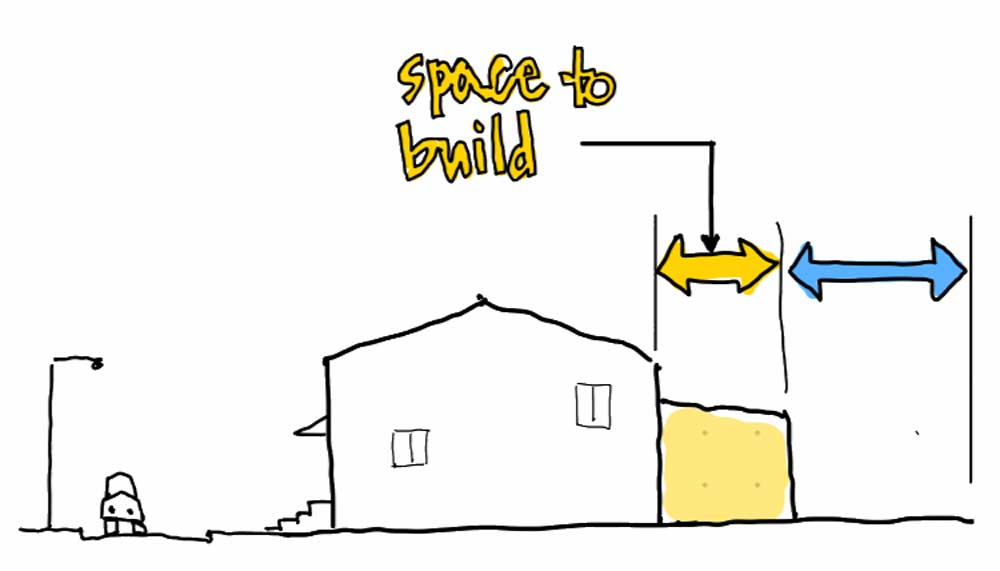
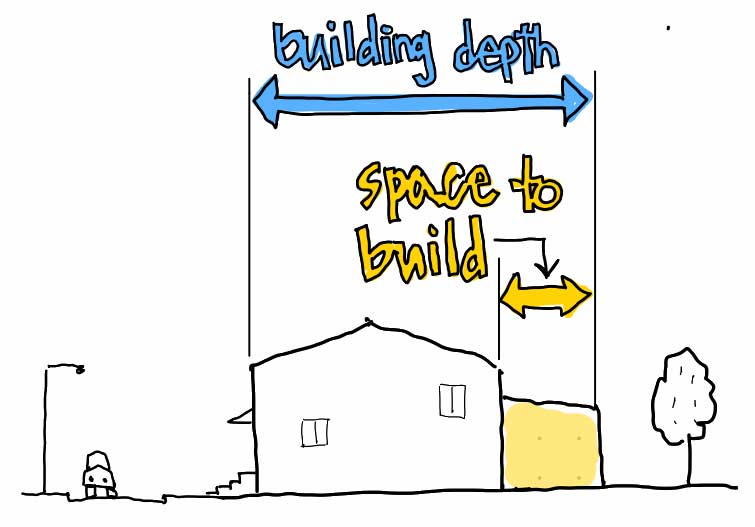
Check if there’s room to add a rear unit.
After you determine the max allowable, building depth, either 17m or 19m, measure the depth of your existing home. Subtract the depth of the home from the allowable building depth to see how much space there is to build.
There’s no required depth for a separate unit, but most are at least 3m deep, though some micro units can be 2.5m or even 2m deep.
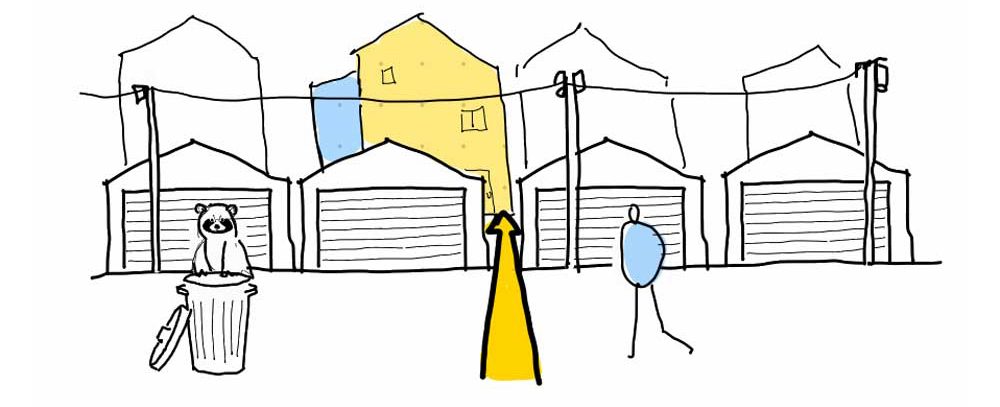
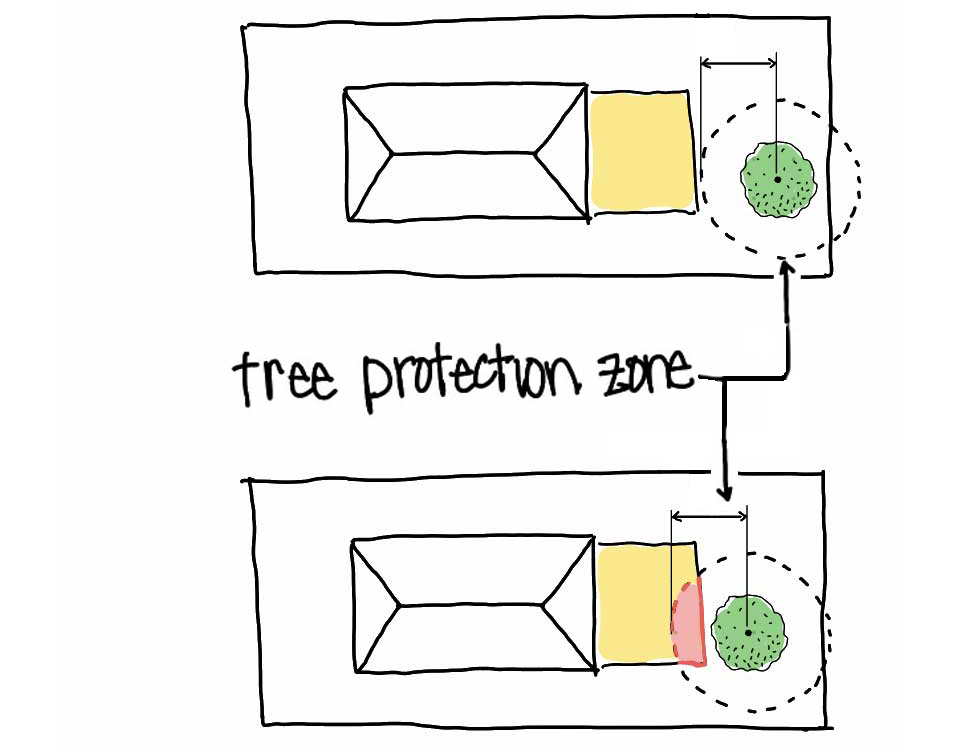
Check for protected trees.
If your answer is yes to either of these questions, your trees require protection. Look up the required dimension for the required Tree Protection Zone around each trees New construction should stay out of this zone, otherwise you will need to apply for a permit to injure or remove your tree.You can find more information on tree protection zones, and permits for injuring or removing trees on the city’s website.
- Are you in an area protected by the Ravine and Natural Features By-law? Check here.
-
Are there any trees over 30cm in diameter?
If your answer is yes to either of these questions, your trees require protection. Look up the required dimension for the required Tree Protection Zone around each trees New construction should stay out of this zone, otherwise you will need to apply for a permit to injure or remove your tree.You can find more information on tree protection zones, and permits for injuring or removing trees on the city’s website.
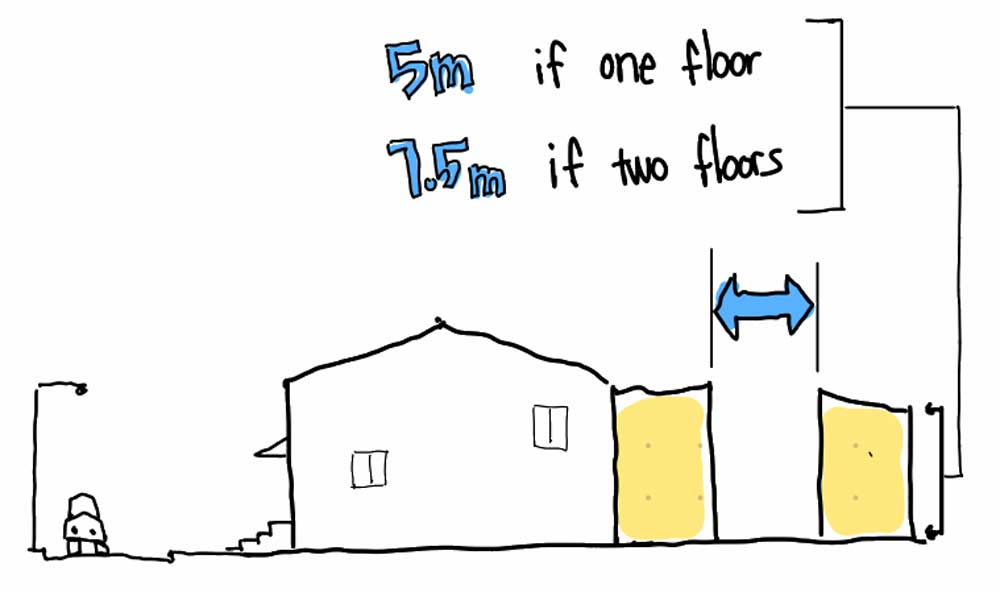
Want to add a garden suite or laneway suite in the future?
Measure the distance from the back of your house to the back of your lot.
Remember you need to maintain a space between a garden or laneway suite and the back of your house. You will need 5m for a one story suite or 7.5m for a two story suite.
You will also need to check the required rear yard setback for the laneway suite. Subtract these setbacks from that number to check if you have enough space. in order to have a viable depth for a new unit you need at least 3m of space for your suite.
Can you put in windows?
Natural light is a necessity for housing.
If your addition will block windows in the existing house, you may need to add new windows to replace them.
We recommend making sure at least 2 sides of your addition are at least 1.2m form the property line. This will make it easy for you to add windows. If your wall is closer to the property line, adding windows requires additional fire protection (like sprinklers or fire shutters) which can be expensive!

Getting in and out safely
Access/egress
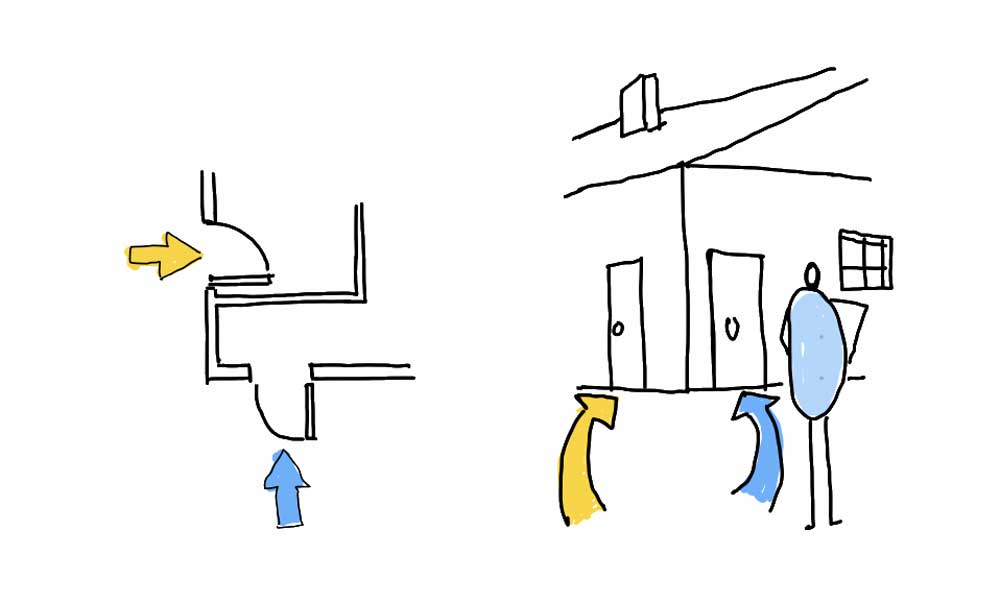
There are two ways you can provide access to units within your house:
Option 1) You can provide direct exterior access.
This means each unit has its own fire-separated exit path from the main space of the unit to the exterior. In this case, each unit will have its own exterior ‘front door.’
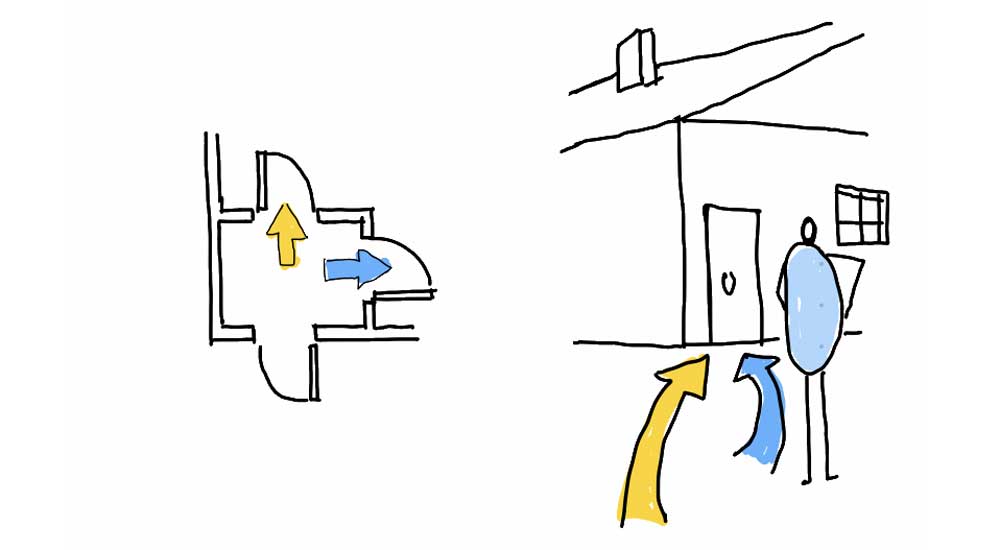
Option 2) You can provide access to the exterior through a shared entryway (and or stairwell depending on the number of units.)
This means units will share a ‘front door’ and have a small section of communal space from which they access the units. You may also need to provide a second exit through a window in your unit that is large enough for a person to get through and easily open without any tools.
Electric, Heating/Air, and Plumbing
Check your utilities
Check your electrical service
Step 1 - Check the existing electrical service on your electrical panel
Find the circuit box. Find the main cut-off switch—this is typically the biggest switch in the box. The cut-off switch often has the number of amps written on it. You will likely need a minimum of 100 amps.
Step 2 - Use the chart below to calculate the existing electrical capacity (Coming soon.)
Step 3 - Check how many units you can add based on the existing electrical capacity. (Coming soon.)
Verify the level of electrical service you will need with a licensed electrical engineer or electrician.

Cost Considerations
Whenever you are deciding what type of unit to add, it is important to understand what are the major cost considerations. For a rear addition renovation, these include:
- unit access
- fire and sounds separation
- site work
- new construction
- fire and sounds separation
- site work
- new construction
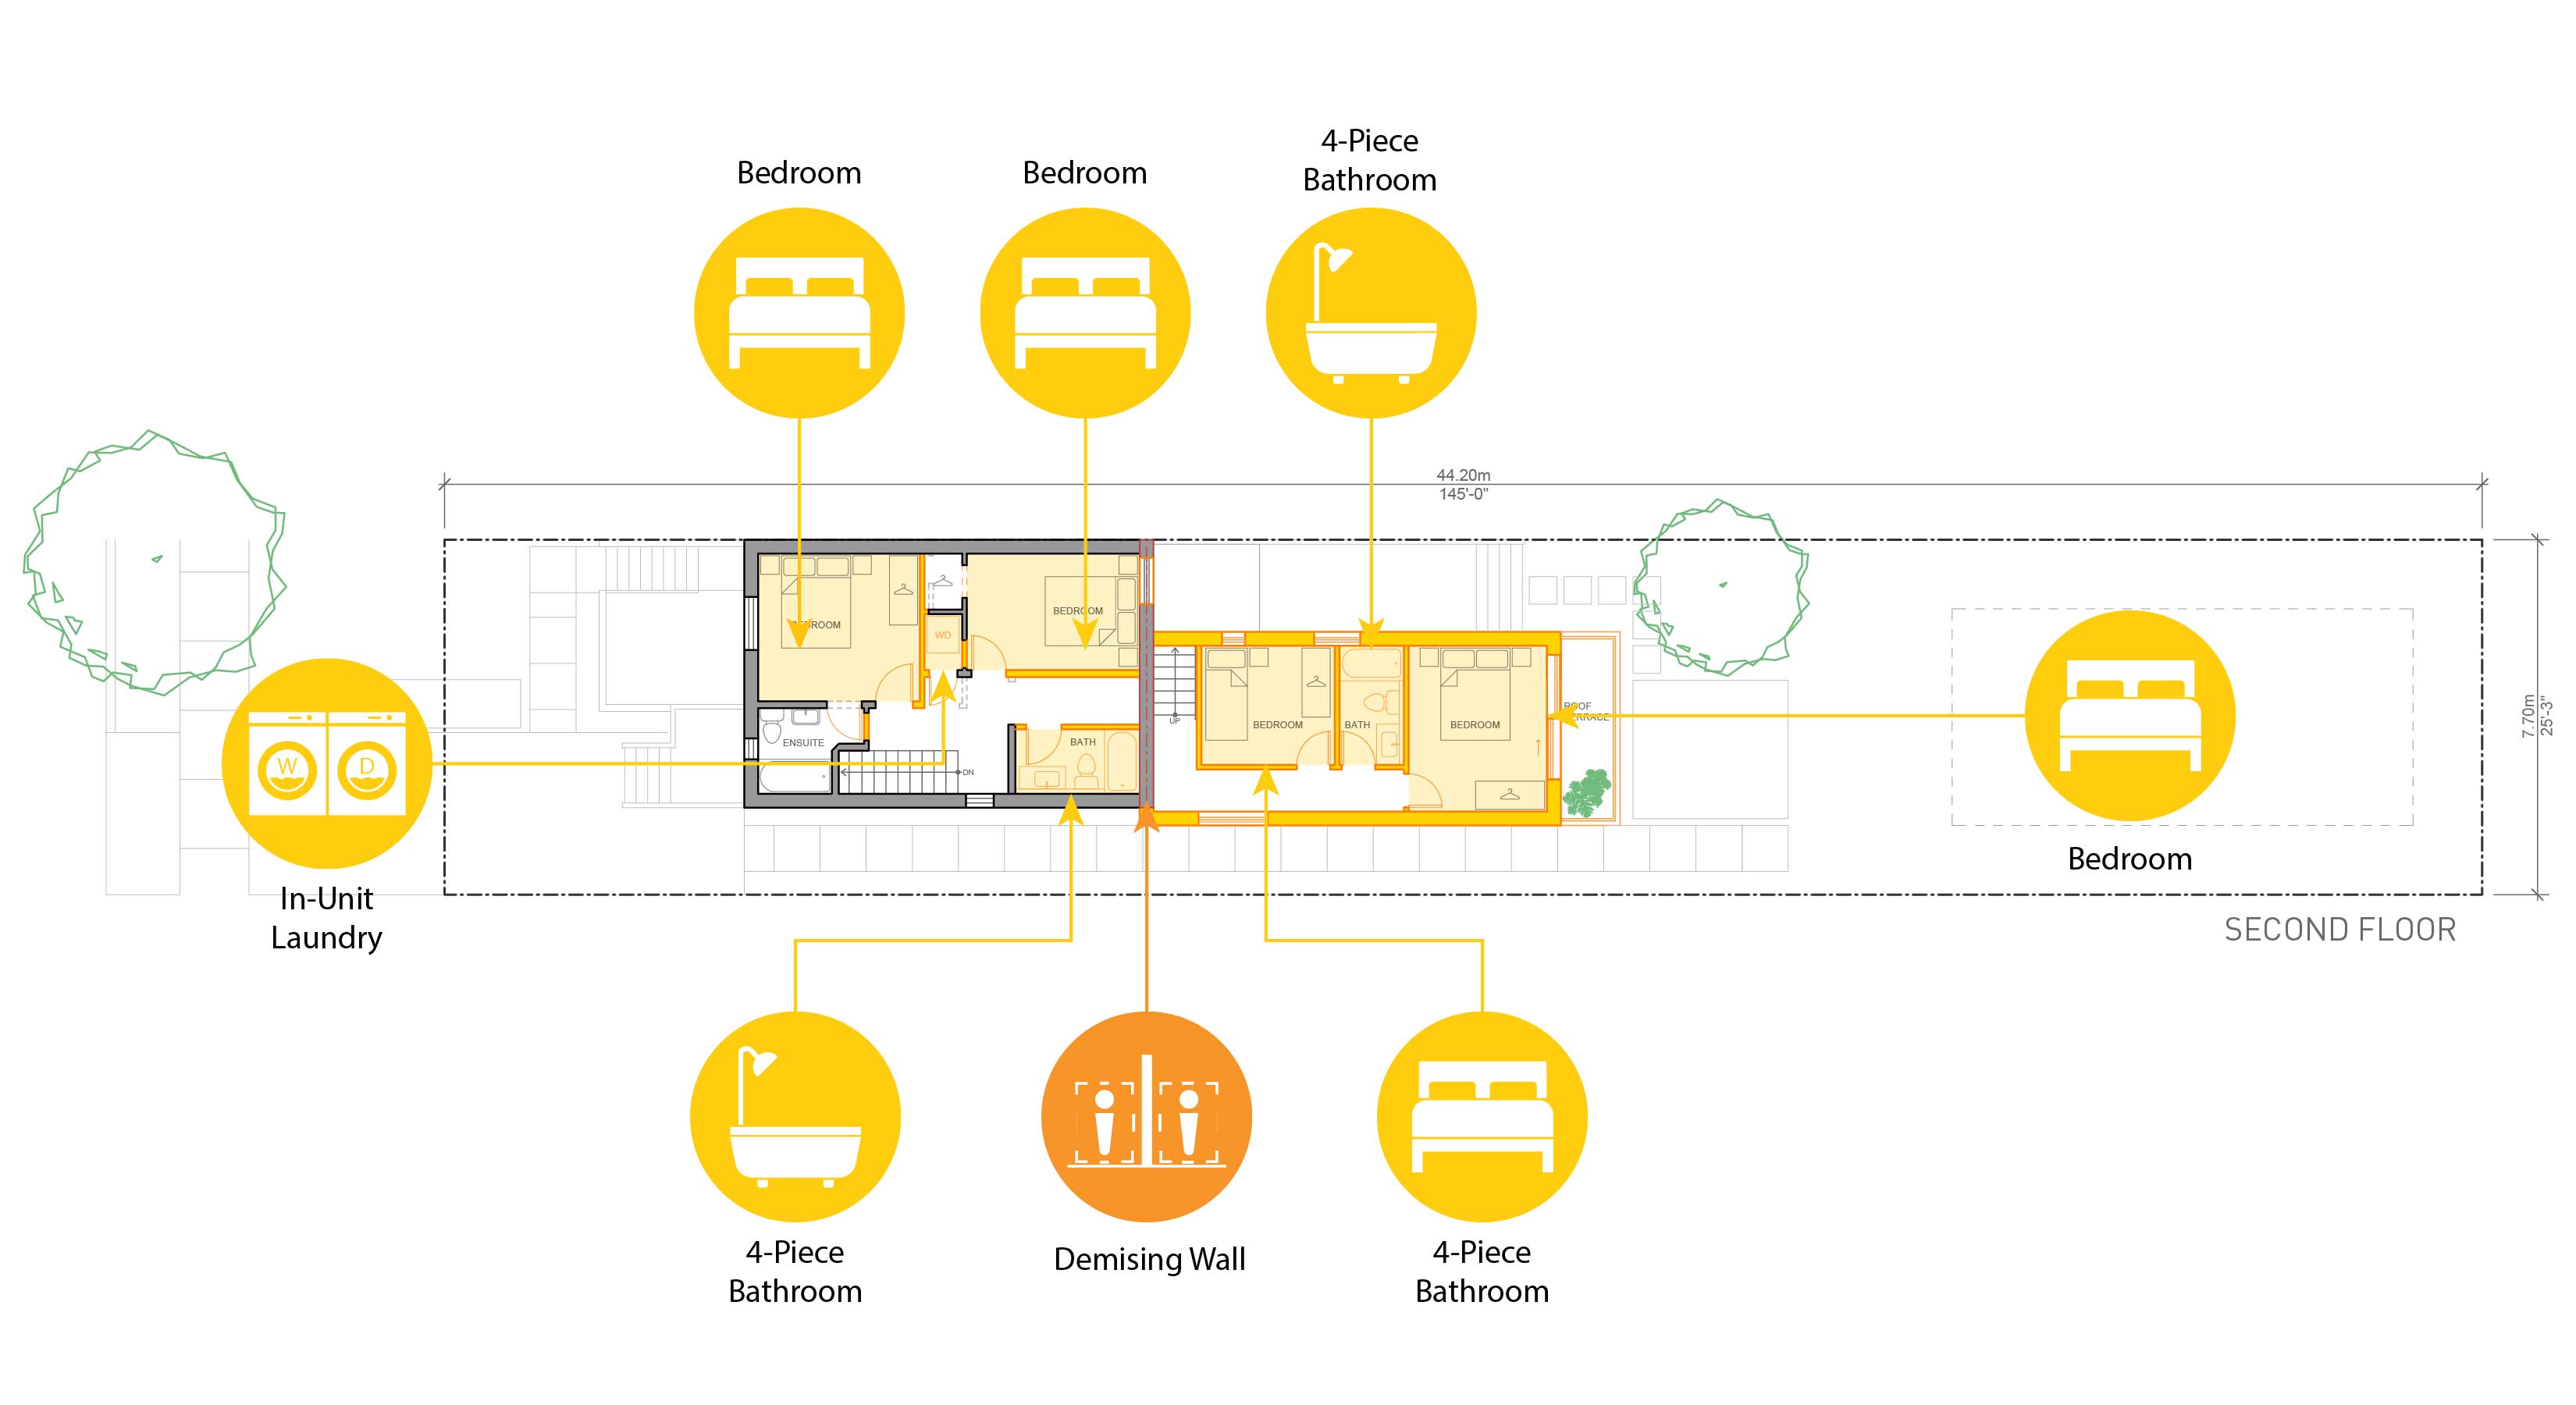
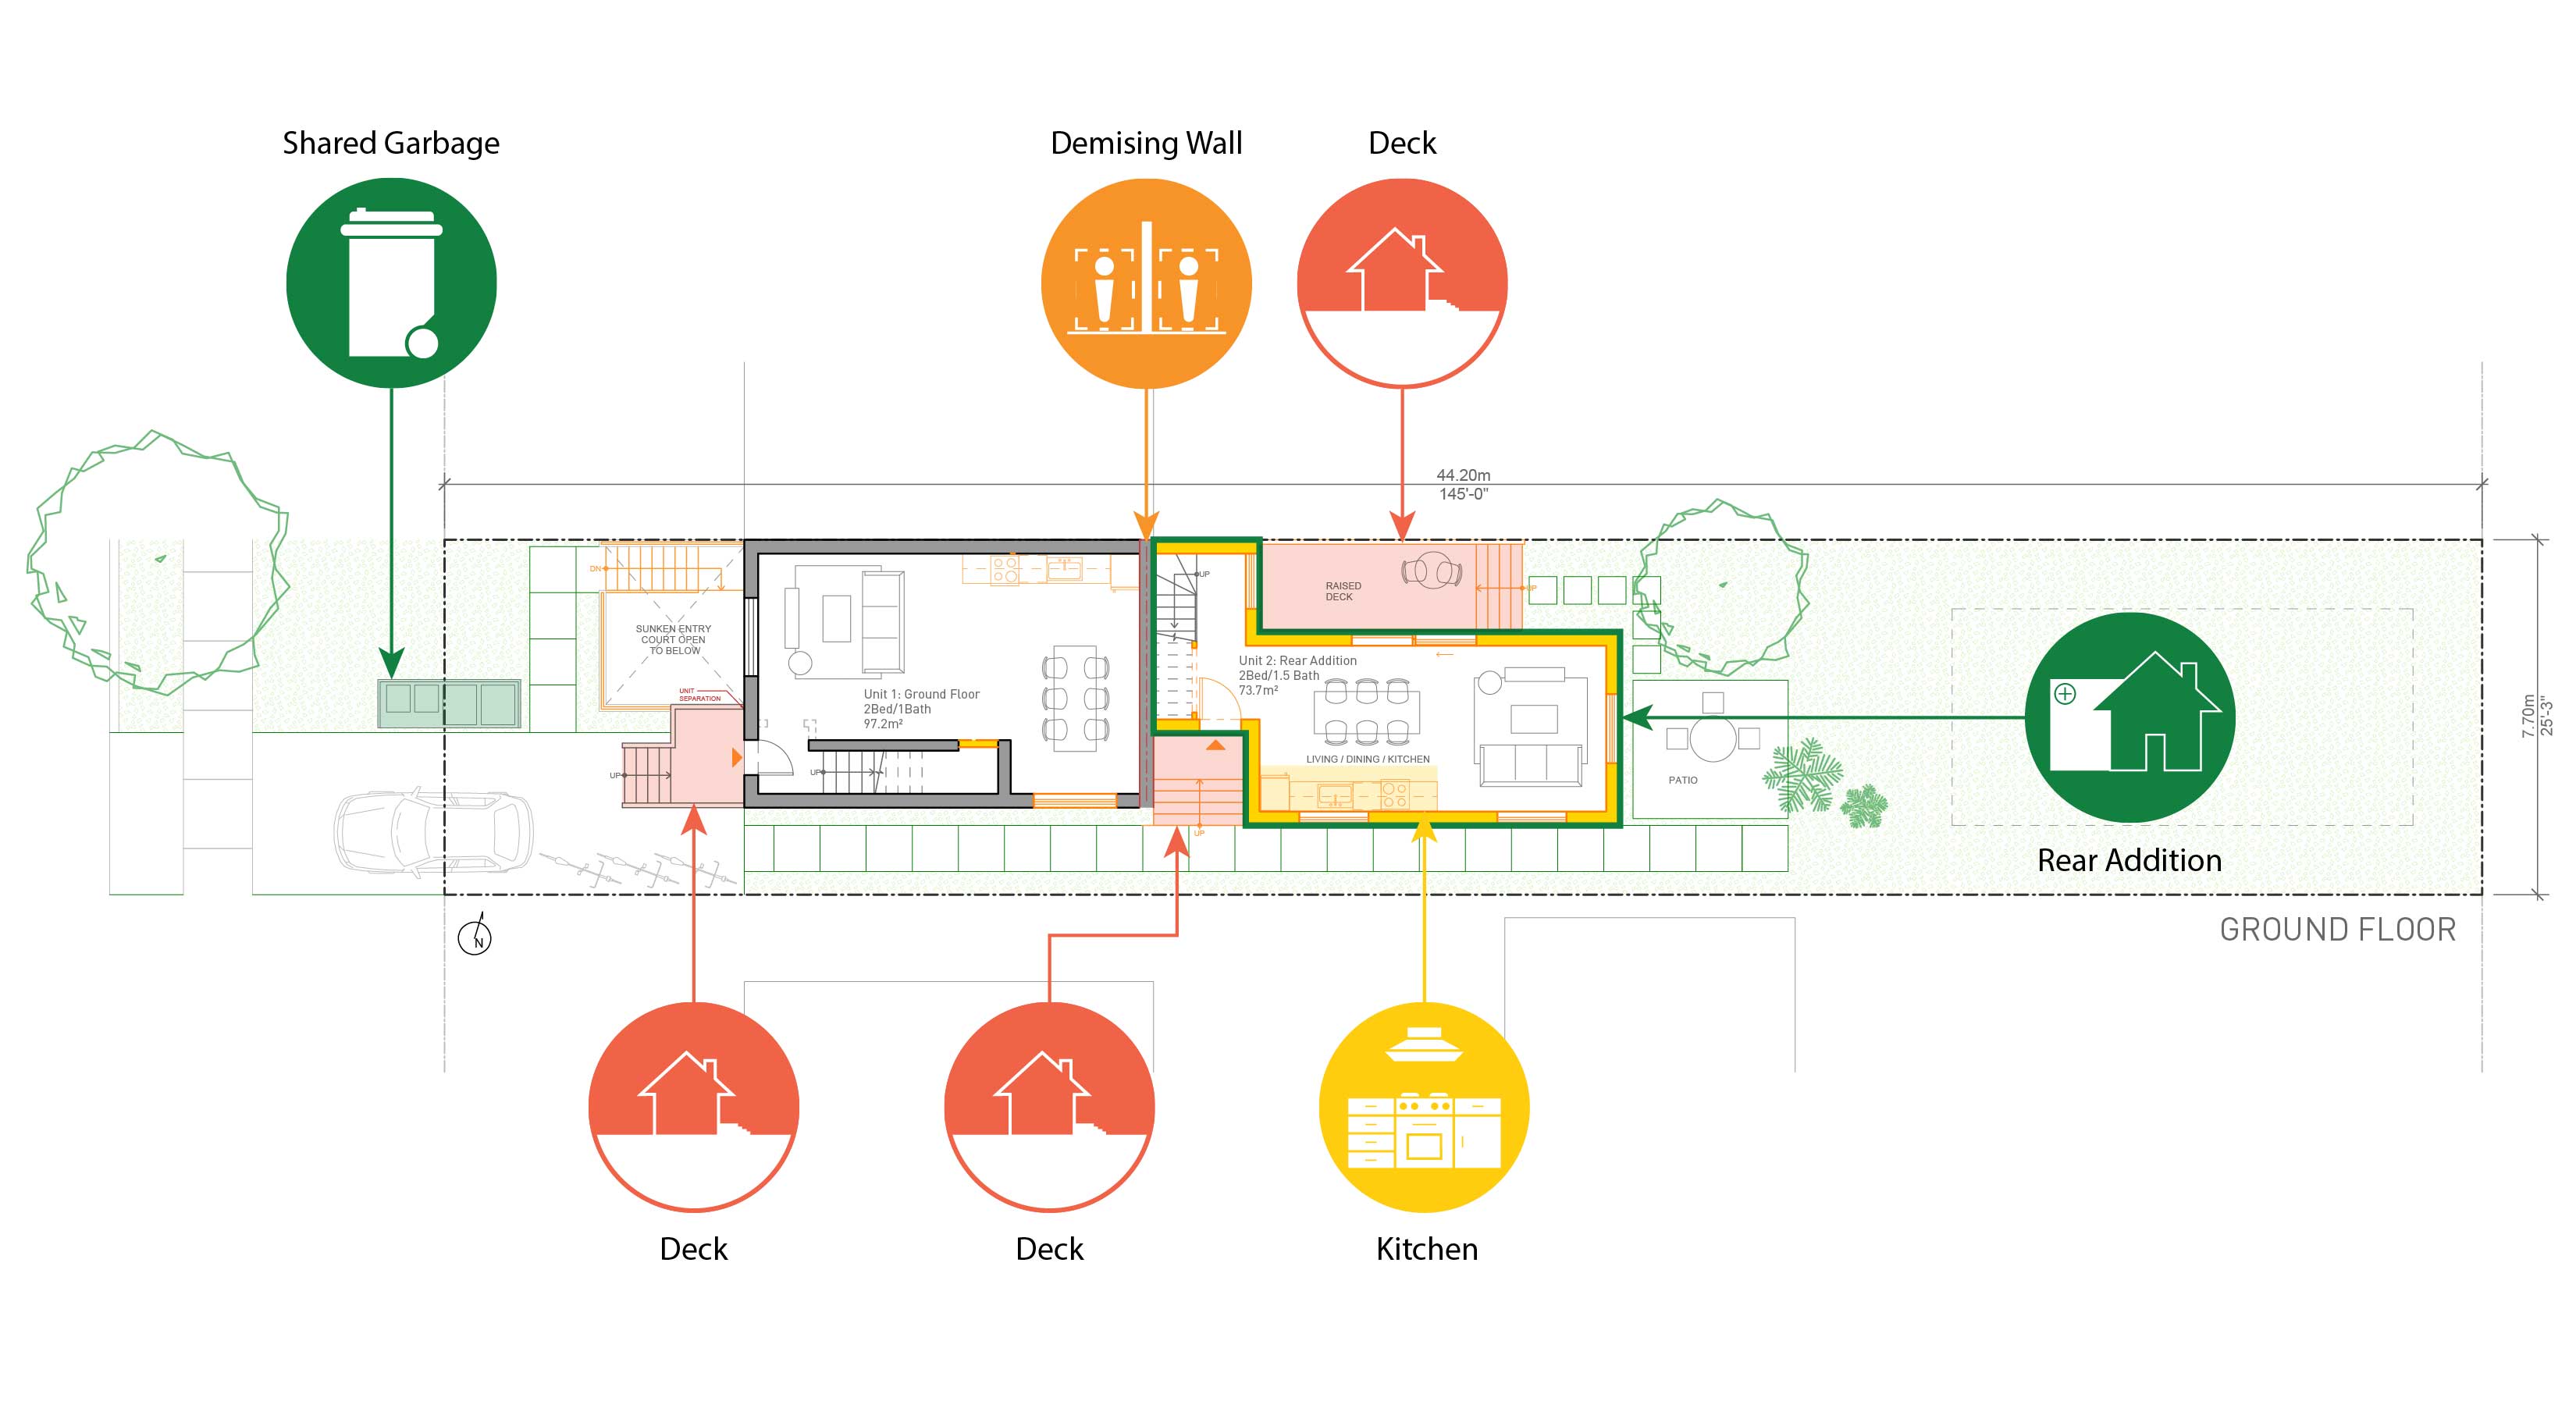
Case study
The rear addition case study involves adding a distinct living unit by building a new structure connected to the rear of the existing
structure
of the house. The only changes made to the existing building are to the rear wall which now acts as the fire separation and unit demising wall. Unit access to the rear addition exists off the side yard of the site. Major considerations include allowable building area, construction implications, and plumbing.
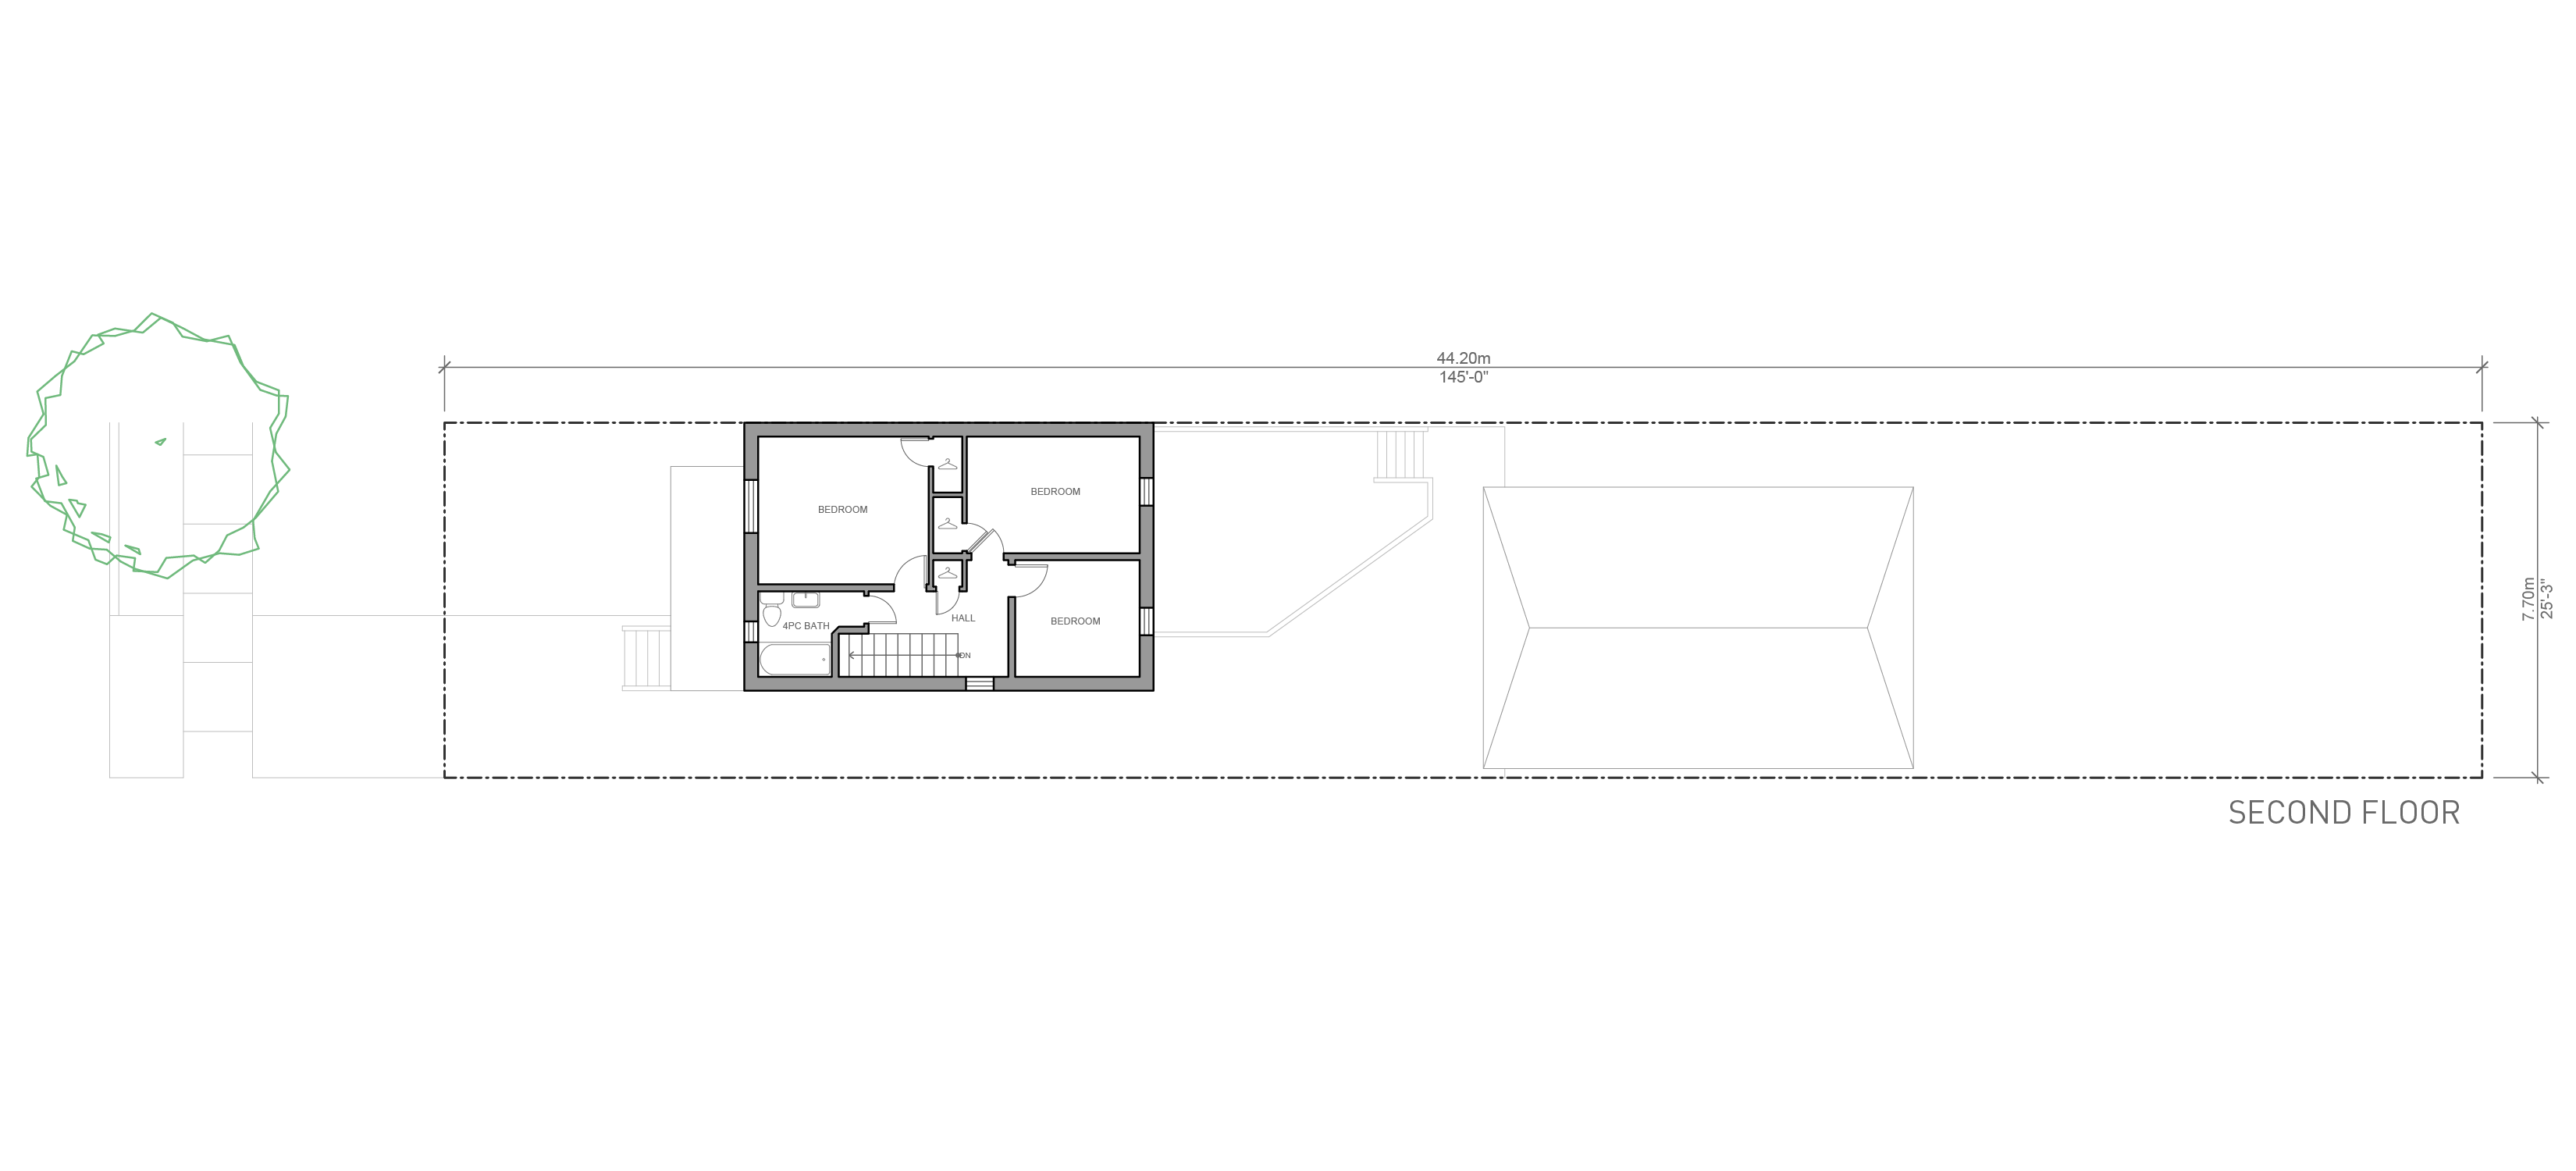
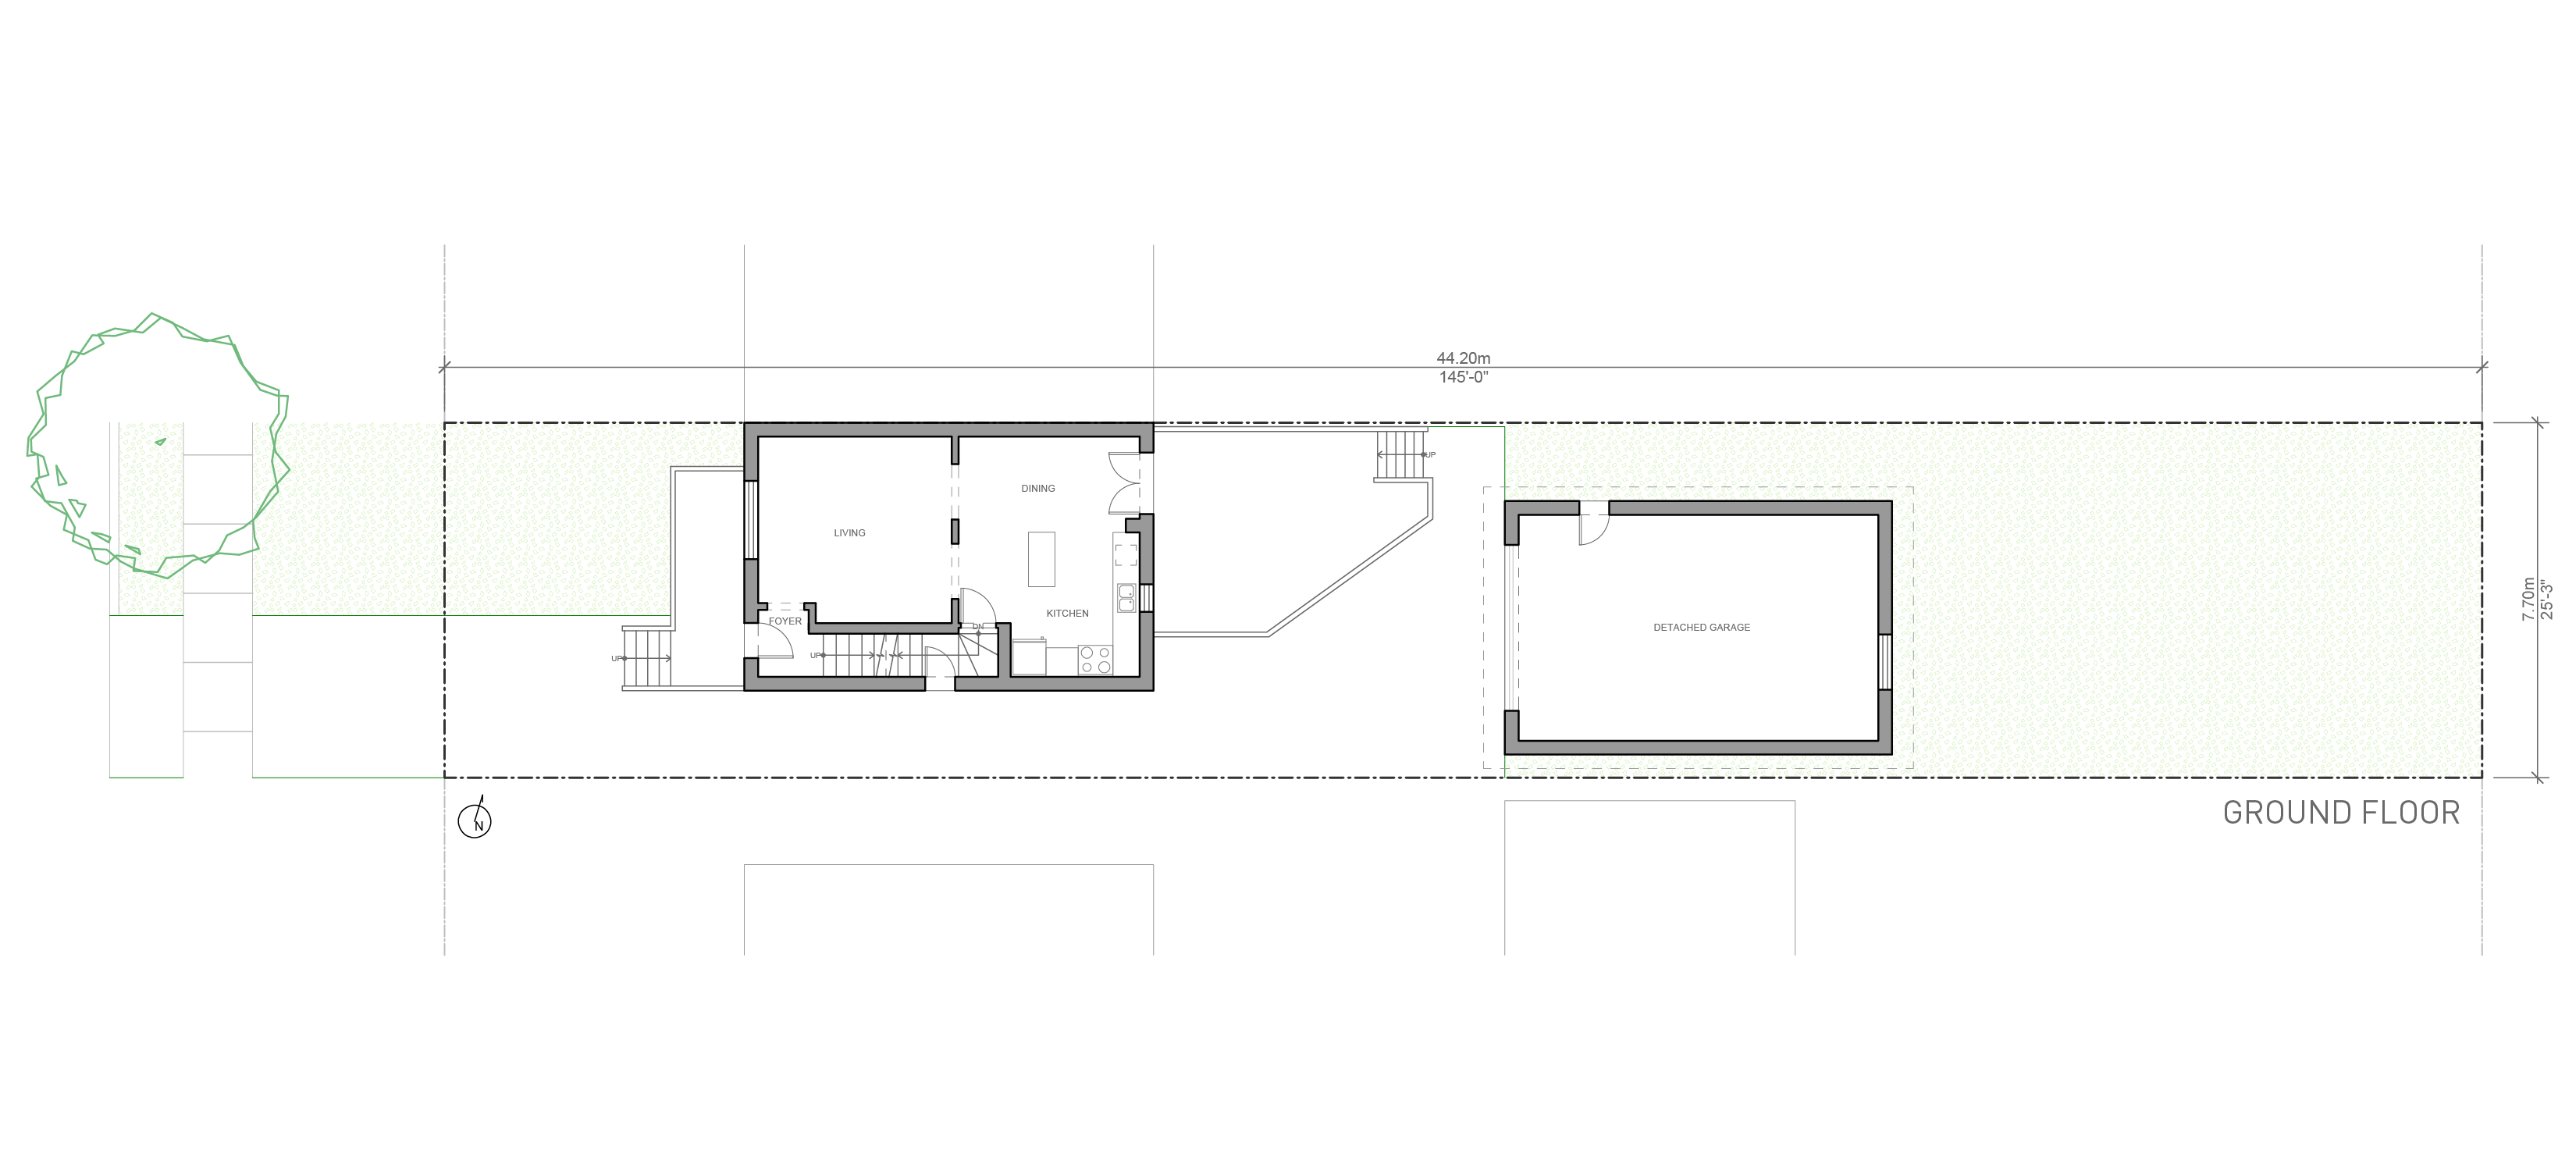
Existing Floor Plans
This website, including all data and information incorporated herein, is being provided for information purposes only and is not intended for and has not been approved for use for construction at any location. For certainty, The University of Toronto, John H. Daniels Faculty of Architecture Landscape and Design and LGA Architectural Partners provides no representation or warranty regarding any use of or reliance upon this website, including no representation or warranty that this website complies with applicable laws (including any applicable zoning by-laws or building code requirements) and no representation or warranty that any cost estimates included in or based upon this website have been validated by the applicable market. Any use of or reliance upon this website by any person for any purpose shall be at such person’s sole risk and The University of Toronto, John H. Daniels Faculty of Architecture Landscape and Design and LGA Architectural Partners shall have no liability or responsibility for any such use of or reliance upon this website by any person for any purpose. Prior to any use of or reliance upon this website by any person for any purpose, consultation with a professional architect duly licensed in the applicable jurisdiction is strongly recommended.